In this blog, I have given steps on how to set up a Passbook on an iPhone.
Digitizing all the cards in the most convenient place- your smartphone! Sounds fantastic? This is what Apple Wallet or Passbook is all about. In 2015, Apple renamed Passbook to Apple Wallet. Let’s dig deeper into How to use Passbook on iPhone 6.
Passbook in iPhone is nothing but another name for the digital wallet. Apple has introduced the feature as part of iOs 6 for the iPhone, Apple Watch, and iPod. With the Passbook app, you can now store your boarding passes, all those retail coupons, loyalty cards, movie tickets, and much more.
Coupons or cards tethered to your purse or wallet can be really an inconvenience and there is always a risk of misplacing physical items. Apple Wallet eradicates this discomfort and you can easily enjoy the benefits of the card.
The best part is that not only you can store these essentials but even access useful information via Passbook.
Your coupon’s expiration date or the balance left on your cards, or your movie seat number, and the list is long enough to go on.
Its extended version allows you to add credit and debit cards to Wallet to pay for purchases using Apple Pay, but this feature is available is only with iPhone 6 or iPhone 6 Plus or later. That means you can use Apple Wallet to make purchases in diverse ranges of outlets.
If you’re one of those users who has no idea about what Apple Wallet is all about, take a look at How to use Apple Wallet/Apple Passbook:
Setting up Passbook
In iOs 6 versions or later, the Apple Wallet comes preinstalled on your iOs devices like iPhone, Apple Watch, and iPod Touch. In case you have been using Passbook earlier, with iOs 9 everything you have stored in Passbook will move to Apple Wallet.
Keep your boarding passes, cinema passes or loyalty cards, etc. in one Apple Wallet, i.e. at one place, and show them on your Lock screen when you need them. You can add passes to Apple Wallet through apps, emails, and websites from participating airlines, theatres, stores, and more.
Note- There is no set limit to the number of passes you can store.
Adding Cards to Wallet
When you first open your Apple Wallet, it is all empty. However, adding cards is a very easy process and won’t consume much of your time. It just takes a few simple steps in order to set up and uses the apps from within Passbook. Take a look at How to get started with Passbook on iPhone:
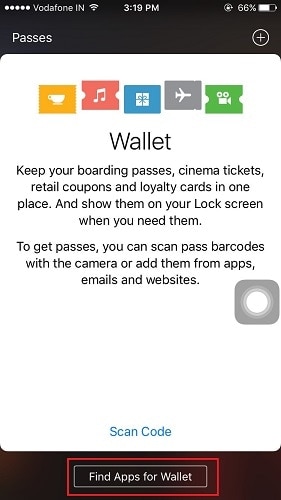
1. In case you know the apps that support Wallet/ Passbook cards, just download them. Otherwise, simply click on find apps for Wallet, and you will be directed to all the apps that support or work with Apple Wallet.

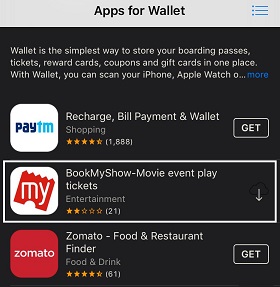
2. Simply tap the Install button next to the app name. There is no search button to search for the specific app, as there aren’t many apps that support Apple Wallet.
3. Here for e.g. let’s take book my show app. Download the BookMyShow app for online booking of a movie ticket.

4. Select the movie and book your tickets in the multiplex you want.
5. While choosing the ticket type, make sure that you select them-ticket option from the app.
6. Once payment has been made, just download the electronic ticket. It will be stored in the Wallet of your iPhone.
Similarly, just dig inside other apps and find out from where you can add passes to the Apple Wallet. You can scan the passes via a bar-code on the front of the pass. Just open and scan and avail the convenience.
Turn On Notifications
Take a look at how to turn on notifications for Apple Wallet:
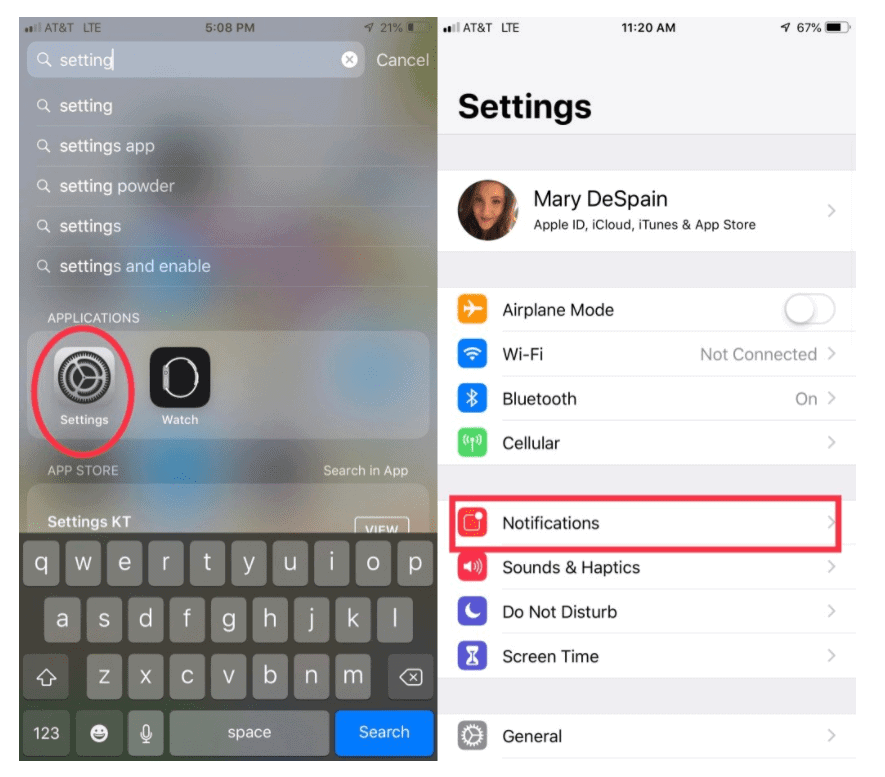
1. Go to Settings and tap on Notifications.

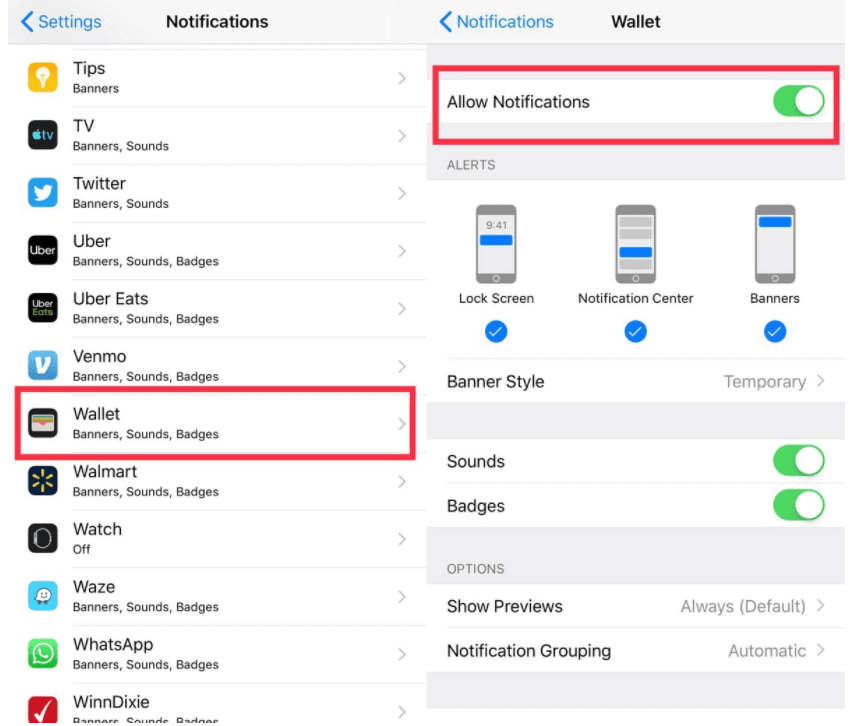
2. Under notifications, scroll down and click on Wallet.

3. Turn on Allow Notifications.
With this, all the alerts will be shown on the Lock Screen, and in Notification Center when it is accessed from the Lock Screen.
However, some cards allow you for automatic updates, under which you will be automatically updated regarding any new offer or changes in your card balance.
Even with the Reminders and Calendar apps as well, some cards can be integrated.
Refreshing Cards
If you feel that features are not being implemented properly or you are facing problems frequently, just refresh your cards in the Apple Wallet. Take a look at how you can refresh cards in Wallet:
- Click on the Wallet app on your iPhone and tap on the card you want to refresh.
- You will see a symbol with “i” enclosed in a circle. This is the info button in the bottom right. Just tap on it.
- And now, just release the card in order to refresh.
Delete Cards from Wallet
It may happen that you want to delete the old cards or some coupons that have expired. Take a look at how to delete a card from inside the Wallet itself.
- Open the Wallet app and select the card that you want to delete.
- Similarly, as stated above tap on the info button. From there, select the delete icon.
- Confirm that you are sure about deleting the past.
- And the card will be deleted from the Apple Wallet.
Quick Links
- Top Apps To Transform Your iPhone/iPod Touch
- How To Fix The Error By Establishing A Database Connection
- How To Burn A DVD On A Mac
Conclusion:- How To Set Up Passbook On An iPhone?
The best part is that the app keeps a note of your most recent purchases. You can anytime take a look at them.
However, adding cards may differ from app to app, as every app is developed in a different way and what settings are being implemented regarding Apple Wallet or Passbook differs.
With Apple Wallet, all your passes will be organized in one place and you will see that your pass will automatically show on the lock screen as and when you reach the destined place.
It is recommended to turn the notifications on because in case there is even a slight chance you will be alerted via push notification.
So just scan your iPhone in order to take payment or redeem points and enjoy shopping or movies in comfort style!
For any other detailed info, you can always refer to the official site of Apple.


