
If you want to learn how to add columns in Elementor, you’ve come to the right place. In this article, we’ll show you how to do it step by step. Stay with us until the end to get all the details.
But before we get into the process, let’s first understand what Elementor is and why columns are useful in Elementor.
Why need Elementor Columns?
If you need to divide your website into distinct sections for your business needs, Elementor columns provide a convenient solution.

You can easily manage and customize these columns using the options available in the Elementor Panel located on the left side. Elementor simplifies the process of creating and modifying columns for web design purposes. With the flexibility offered by the Elementor page builder, creating columns according to your preferences becomes a straightforward task.
How to add columns to Elementor?
Here are the best ways to add Elementor columns:
Method 1: Add an Elementor column by the right-clicking
- Go to the section you want and put your mouse in the middle.
- Use your right mouse button to click on the column icon on the left.
- Choose “Add New Column” to add a new column to the section.

Method 2: Use Handles to add Elementor Columns
There is another way to perform column-related actions in Elementor, which involves enabling the “Editing Handles” option. Follow the steps below to activate the editing options in Elementor:
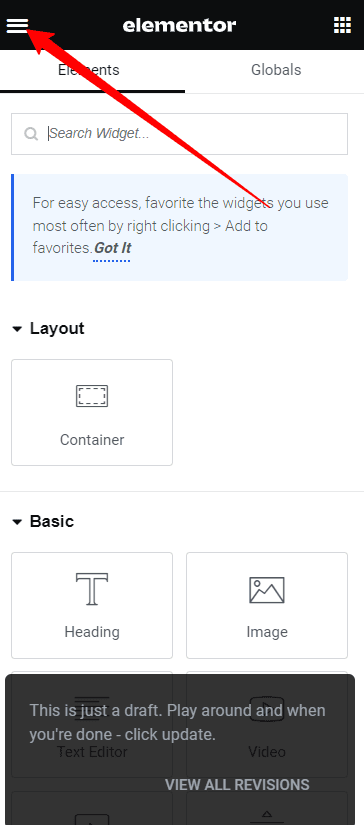
Open the Elementor toolbox menu.
Click on the button with three horizontal lines located at the upper left corner of the page. This will open the Elementor menu.
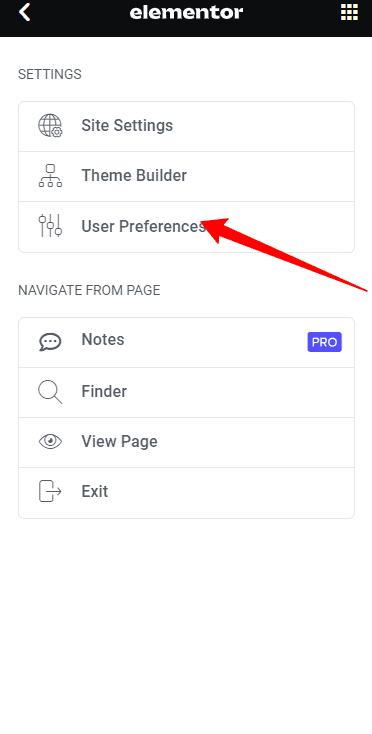
Go to the preferences menu.
Click on the preferences menu within the Elementor toolbox.
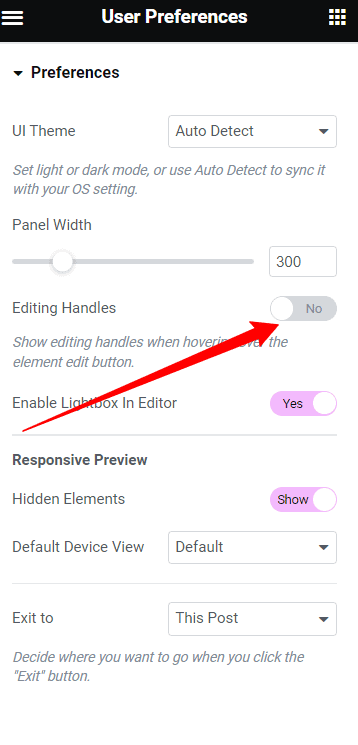
Toggle the Editing Handles to “Yes”.
In the preferences menu, find the option to enable Editing Handles and switch it to “Yes”.
Hover over the edit column icon.
When you hover over the edit column icon in the section, you will see the handles appear. These handles allow you to perform actions like adding, duplicating, and deleting columns.
Click on the “+” icon to add a column.
Once the handles are visible, you can click on the “+” icon to add a new column.
Conclusion
In conclusion, adding columns in Elementor can be done by either right-clicking on the column icon and selecting “Add New Column” or by enabling the “Editing Handles” option and using the handles to add, duplicate, or delete columns.
These simple steps empower you to enhance the layout and design of your website with ease using Elementor.
Looking to explore more? Save using the Elementor discount coupons here.
Also Read:

