How to map a network drive, is it the question that keeps you fussed all the time??
Well, no need to feel cringe. You are not alone who is struggling and wondering how do I map a network drive.
So be easy and stay with us, we will teach you everything you need to know concerning drive mapping.
Mapping a network drive simply means creating a shared space, allowing other users in the network to use that space easily.
It’s a good practice when you want to give access to other people in the network or your co-worker to any folder or document on your computer.
Once a drive is mapped and shared space has been created, anyone in the network can share their folder to the shared area and everyone in the network can use this folder as if it resides on their own computer.
This feature of windows comes out really handy for a team, working on the same network.
And the best part is, mapping a network drive is an extremely easy task!
Now many people know this amazing feature of windows and they don’t utilize it the way it should be, but don’t worry you won’t relate to those people after going through this tutorial.
After getting to know about mapping a drive, I’m sure you really can’t wait to learn how to map a network drive! So let’s dive deeper into the tutorial.
How to Map a Network Drive:
In order to map a network drive, you don’t require any additional software or some special technical skills, even a non-techie can map a drive easily.
Mapping network drive involves different steps for different windows. Due to the word constraint, we don’t claim to have covered all the operating systems, but we surely have mentioned the most popular windows including windows XP, and Windows 7
With all the necessary screenshots provided, I’m sure by the end of the guide, you’ll get to know everything you need to know regarding mapping a network drive.
#Windows XP:
Mapping a network drive in Windows XP is really simple. The below steps will help you understand the procedure better to map a drive on Windows XP. If you are a Windows XP user, this section of the tutorial is dedicated to you. Let’s get started with the guide.
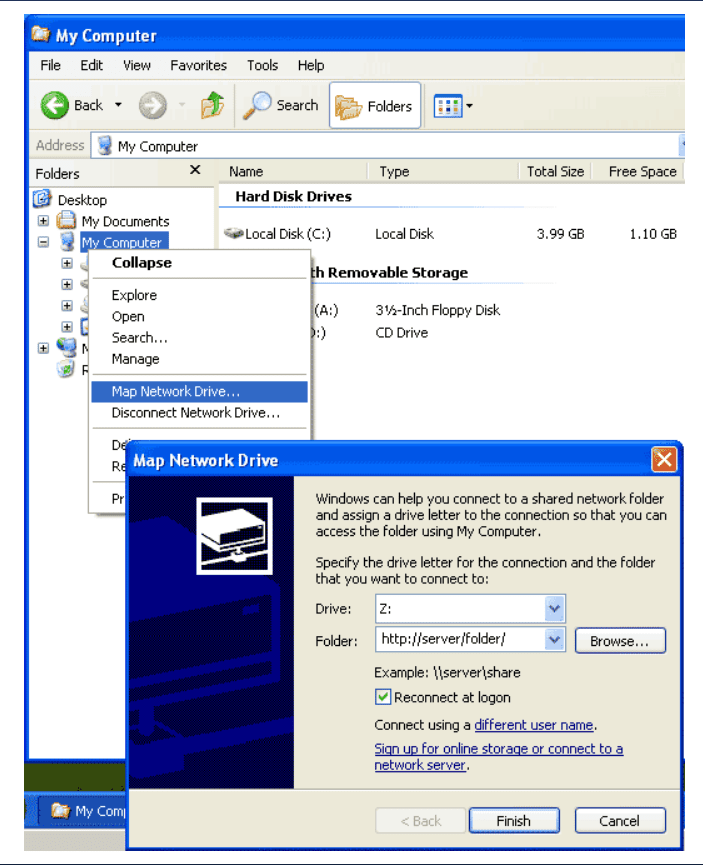
Click on the start menu, and go to “my computer”. Now click on the Tools menu located on the top and select Map network drive… If you find difficulty in locating this option, don’t forget to have a look at the screenshot we have grabbed just for you.

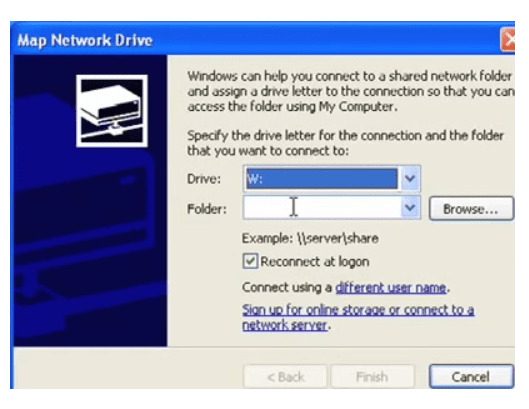
As sooner you select the ‘Map network drive’ option, a pop-up window will be opened, similar to the below screenshot.

What the options in this window mean and what we need to fill in them, I’ve mentioned in the below module because all these options are identical for Windows 7,8, and vista, and the majority of people like using windows 7,8, and vista as their operating system.
So let’s jump over to the second module of this tutorial.
#Windows 7/Vista:
Windows 7 and windows vista users need to follow the below steps in order to map a network drive on their computers. The process is almost similar to all the windows. Let’s figure out how
- First of all, click on the start menu and go to ‘my computer.
- There on the ‘my computer’ window, click on the ‘Map network drive’ option on the top menu. If you can’t locate the option, refer to the below screenshot.

- As sooner you click there, the Map Network Drive dialog box will pop up, similar to the below screenshot.

- In this step, you need to specify a drive letter to your connection and a path to the folder to be connected. Under Drive, select any available drive letter from the drop-down menu. Once done, come to the next field and browse to the folder on your computer you want to share, or simply mention the path of the folder in the format \computernamepathtofolder or if it’s from another computer, the path should look like \servershare.
- If you want to reconnect manually after every time you log on to your computer, check the first option Reconnect at login, and select the second option i.e. Connect using different credentials if the folder you want to map is not on your computer.
- Once you are done with all this, click the Finish button and the drive would be mapped.
Note: You can’t map a folder until it’s shared. In order to make a folder shared, navigate to it on your computer, right-click on it and go to properties. Click the Sharing tab and go to the Advanced Sharing option. In the new window, select the option Share this folder and click on Ok. The folder would be shared successfully.
Also, do keep in mind that if the connection with another computer in the network, you are trying to establish fails to take place, probably that computer is turned off, so need to panic in that situation. Just contact that system administrator and ask him to turn on the computer.
Easy, isn’t it??
All the steps are identical for windows vista with just a minor deviation. Once on my computer window, you won’t find Map Network Drive directly like windows 7, instead, you need to click on the Tools menu and then select Map Network Drive similar to windows XP.
Mapping a network drive is one of the not-so-popular features of windows. The procedure is not tough, though but since many people don’t know how to map a network drive, they don’t leverage this feature to the fullest!
The basic purpose of bringing out this guide was to illustrate some more information on this topic. And we believe that we have successfully done this.
If you think we have missed out on something, feel free to mention it in the comments below. If you know any other way to map out a network drive, don’t forget to mention that too! We love hearing back from our readers!
Quick Links-


