In this blog, I am going to discuss how to set up Raid volume on Mac.
We all have some important data on our computers, and I guess none of us wants to lose those data at any cost. So, what do we do now to feel safe about our important files and data saved in it?
Keeping multiple backups can be a good choice. RAIDing helps us to keep a safe backup of the computer data. In this article, we are going to discuss how to set up raid volume on Mac.
RAID is a Redundant Array of Independent Disks. It was also called Redundant Array of Inexpensive Disks before. RAID helps to combine multiple data files to one single volume and increase the capacity, speed, and redundancy too.

Table of Contents
Types of RAID
RAID has different types; they are also called RAID levels. Generally, RAID has six setup levels, but for Mac, there are only two levels. They are discussed as such:
RAID 1: The RAID 1 level is known as “mirrored” RAID. As it is named mirrored RAID, it actually mirrors the data or info contents of one disk onto every single disk in the array of the RAID.
Basically, the data is copied to each and every disk of the array, so that if one disk fails to provide the data stored; then all the data can be recovered from any other disk of the array. It means you will get your data if anyone disk of the array is working.
[Note: RAID 1 is not considered as a backup because whenever data is written to the RAID 1 set, it is copied to each and every disk of that array; The same thing happens when you delete something. It is deleted from all the disks. ]
RAID 0: This RAID 0 is known as “striping” RAID. This striping RAID combines multiple disks into one, larger volume. Data stored in this type of array are distributed equally among all the disks present in that array. It helps for faster reading and writing times.
But the main problem of this type of array is if one of the disks of RAID 0 level fails then all the disks of that array would fail to provide you with the data. This type of RAID is very useful for working with files of larger volume.
However, there is also another type of disk set-up available. Though it is not a RAID setup, it serves the same purpose. It is,
CDS/JBOD: It stands for Concatenated Disk Set (CDS), it is also known as Just a Bunch Of Disks (JBOD). It is not actually a RAID setup. You can concatenate a number of disks into a single large volume of the disk.
So these are what RAID levels are, now I am going to tell you about the setup of RAID,
How to Set Up Raid Volume on Mac?
In the previous versions of the Disk Utility app, there were options to create and manage the software of RAID volumes or to concatenate the drives (CDS/JBOD). These options are not available in OS X El Capitan; the RAID option had been removed.

It was a very simple process before. Now when the RAID option is removed, we are here to discuss how to do the same by finding some other way out.
Let me tell you there is nothing to worry about, cause we can do the RAIDing via the Terminal app.
Step 1.
The number of drives to be included in the RAID is to be calculated first. To do this, use “diskutil“ command followed by the “appleRAID” subcommand.
Step 2.
The syntax for using command is,
diskutil appleRAID create stripe|mirror|concat setName fileSystemType memberDisks
Step 4.
Then connect the disks you want to be RAIDed to the computer.
Step 5.
Open Disk Utility.
Step 6.
Select the disks in the left pane, and check the value of the “device” property. You will need to enter the value of the “device” property in the Terminal.
Step 7.
Now open the Terminal and type,
diskutil appleRAID create <stripe/mirror/concat> setName fileSystemType memberDisks.
It would be like,
Sayanis-Macbook-Air:~ sayanibiswas$ diskutil appleRAID create stripe
StripedRaidArray JHFS+ disk1 disk2 disk3
Step 8.
You need to replace keywords with stripe (for RAID0), mirror (for RAID 1) and concat (for CDS/JBOD).
Step 9.
Also, replace the “setName” with the name you want to keep your RAID volume.
Step 10.
Rename the “filesystem type” with JHFS+ and in place of “memberDisks” type the values you noted down in Step 6, and do leave spaces between the names of each disk.
Note: For example, if you want to create a mirrored RAID set with the name “Backups” and the device ids of your disks are “disk3”, “disk4”, “disk5”.
The command will be like this:
diskutil appleRAID create mirror Backups JHFS+ disk3 disk4 disk5.
Step 11.
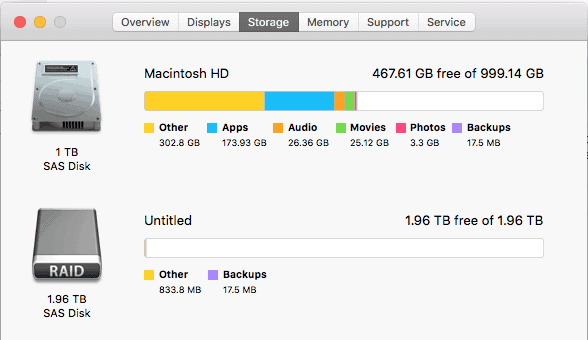
Then run the command, and when the process is completed, the OS X will automatically mount the RAID volume. It will be found in Disk Utility.
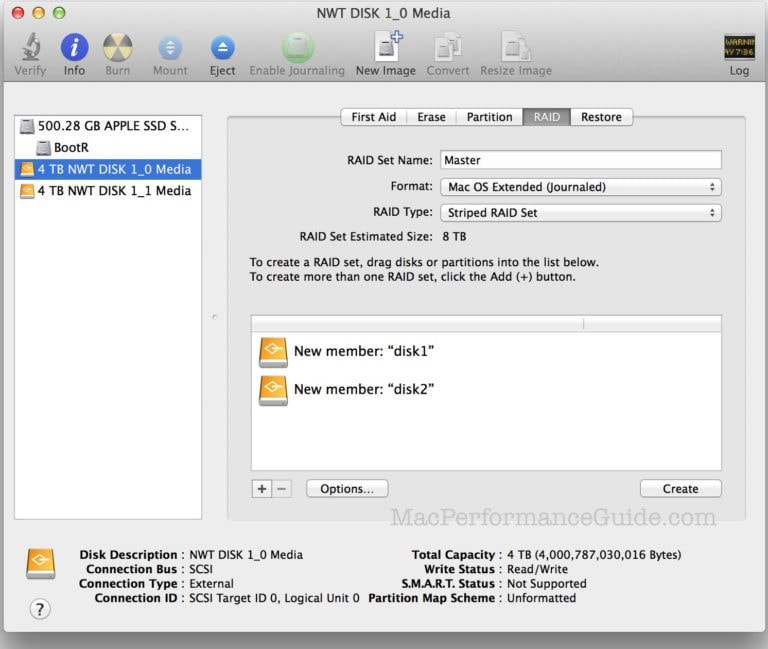
How to create a mirrored RAID set?
Follow the steps to create a mirrored raid set,
Step 1.
Launch Disk Utility.
Step 2.
At the left pane of the Disk Utility window, select a hard drive you want to use in the RAID 1 mirror set.
Step 3.
Then click on the ‘RAID’ tab.
Step 4.
Type a name for the RAID 1 mirror set.
Step 5.
Go to RAID type, and select “mirrored RAID set.”
Step 6.
Then go to ‘Options,’ set a size for the RAID, then click on ‘ok.’
Step 7.
Lastly, click on the plus ‘+’ button. Your RAID 1 mirror set will be added to the arrays.
Quick Links-
- How To Quickly Delete All WordPress Comments With One Click
- How To Stop Spam Comments On Your WordPress Website
- How To Fix The Error By Establishing A Database Connection
Bottom Line:- How To Set Up Raid Volume On Mac?
This is all about how to set up raid volume on Mac.
If you are left with any more queries, contact us in the comment box below. We would love to hear from you.
Also, if this article helped you anyhow then share it with your friends and let them know. That’s all for today.
Read Next, How to Play Facebook Messenger’s New Secret Soccer Game? Did you like this article? We have more such articles about Mac on our website! Do check them out as well!


