In this article we have featured How To Transfer Your WordPress.Org Blog To A New Domain. You will learn how to transfer your WordPress blog from its current domain to a new one in this guide. If you want to migrate your WordPress.com blog to a self-hosted installation, follow the instructions in this article.
However, there are several crucial aspects to take into mind before you begin moving your self-hosted WordPress.org blog to a different domain.
Most importantly, the process of switching to a new domain will have a substantial impact on your search engine rankings, since it will take some time for the search engines to acclimatize to the change.
Because of this, you will unavoidably experience a decrease in traffic during the first few weeks of operation. Throughout this post, we’ll look at the actions that must be taken in order to relocate your WordPress blog to a new domain while maintaining your SEO rankings.
Table of Contents
1 – Back Up Your WordPress Database

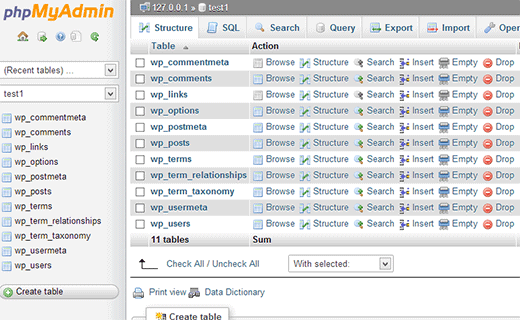
Due to the fact that you will not want to take any undue chances during the move, it is critical that you take a few extra steps to back up your WordPress database, which contains all of your information, including posts and comments. A free plugin such as WP-DB-Backup, which we will be utilizing for the purposes of this tutorial, is the quickest and most convenient way to back up your database.
1. Go to “Plugins > Add New” and type in “WP-DB-Backup” to find the plugin. 2. Once the installation is complete, click “Activate Now” to make the plugin operational.
2. Select “Tools > Backup” from the menu bar and then “Download to your computer” before hitting “Backup Now.” 3.
You can also use this program to arrange automatic backups, which can be downloaded to your computer, emailed to you, or saved to a remote server, such as your Web hosting FTP server, for future reference.
2 – Export and Import Your Content
After setting up your new domain and installing WordPress, you will be able to export your existing content and import it into the new website. WordPress includes an export feature that makes the process of transferring data easier.
1. Select “All content” from the drop-down menu under “Tools > Export” before clicking “Download Export File.” 2.
Go to the “Tools > Import” section of the administrator dashboard of your new WordPress site. Choose “WordPress” from the drop-down menu at the bottom of the list, and then upload the export file that you just downloaded to the server. After you click on “Upload file and import,” your material will be shown on your new web page.
It should be possible to see all of your posts and pages on your new WordPress site. The migration of new content, such as photographs and other uploads, will also be required. You will also need to re-download and adjust any plugins and themes that you may have previously installed.
3 – Migrate Your WordPress Uploads

Manually transferring all of your WordPress uploads to your new site using an FTP software such as FileZilla is the quickest and most practical method of getting everything done. Additionally, your hosting firm will most likely supply a Web-based client; otherwise, you can use the File Explorer on Windows 8.
Enter the FTP server of your former WordPress site and navigate to the directory “wp-content/uploads.”
2. Download the complete folder and copy it over to the matching directory of your new WordPress site, overwriting any files that are suggested to be overwritten as needed. Alternatively, if you want to keep any prior uploads on your new site, you’ll need to merge the directories without overwriting any of the files.
Quick Links:
How To Choose The Perfect Blog Topic For You
4 – Restoring Your Themes and Plugins
Despite the fact that all of your material and uploads will now be available on the new site, any customizations will need to be completed anew on the old one. If you wish, you can have the premium plugin “BackupBuddy” take care of this for you instead.
1. Uninstall and reinstall your theme, then reconfigure it. If you have made any changes to the theme’s coding, it is probable that you will be better off manually moving the files over from the FTP server on your old site. Your themes will be located in the “wordpresswp-contentthemes” directory on your server.
2. Reinstall and reconfigure any plugins and widgets that you want to use on your website. The quickest and most straightforward technique is to open both your old and new WordPress sites side by side and manually go through the settings one by one on each site.
It is likely that your new WordPress site will seem very similar to your old one, though there are a few more crucial points to keep in mind. You may need to update any internal links on your new site to point to the new domain, and you may automate this process by using a plugin such as “Pretty Link” from the WordPress plugin repository. As well as updating any RSS feeds, you’ll also need to set up a 301 redirect to ensure that people, as well as search engine crawlers, are instantly forwarded to your new domain name. In addition to these steps, make sure to submit a new XML sitemap to Google, and properly test your new WordPress site.


