Wireframe tools help you create a blueprint for your website or app. They’re a great way to map out the functionality of your site or app and to get feedback from stakeholders early on in the design process. In this post, we’ll show you how to use wireframe tools to create high-quality prototypes.
User experience design is crucial to the success of any digital product. A wireframe is a simple visual guide that helps designers map out the structure and layout of a user interface. In this blog post, we’ll show you how to use wireframe tools to create effective UX designs.

Table of Contents
What Is A Wireframe?
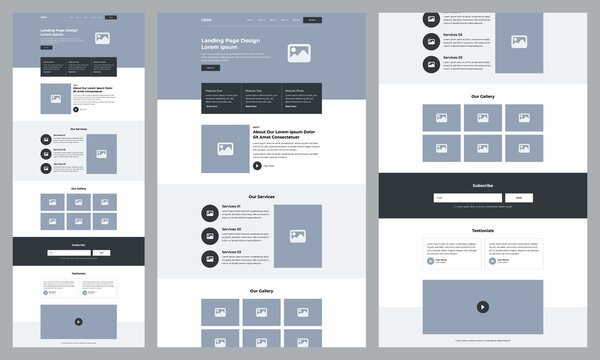
A wireframe is a low-fidelity sketch of a user interface. It’s a visual guide that helps designers map out the structure and layout of a user interface.
Wireframes are usually created using simple shapes and lines, and they don’t include any color or branding elements. This makes them different from high-fidelity prototypes, which are more detailed and closer to the final product.
Wireframes can be used for websites, apps, or any further digital products. They help designers communicate their ideas to stakeholders and get feedback early on in the design process. Wireframes are also useful for planning out the content and functionality of a product before investing time and resources into creating higher-fidelity prototypes.
Why Use Wireframe Tools?
Wireframe tools offer a number of advantages over traditional methods like pencil and paper.
- They help you define the structure of your website or app before investing time and resources in visual design. This allows you to make changes early on in the process without incurring too much cost or effort.
2. They force you to think about the user experience early on in the process. What do users need to do on this page? What information do they need? How will they navigate from one page to another? By thinking about these things early on, you can avoid having to make major changes later on down the road.
3. They provide a common language for designers, developers, stakeholders, and clients to communicate their ideas. Because they focus on functionality over form, they can help reduce disagreements about the direction of the project later on.
4. They’re easy to change and iterate on. Unlike high-fidelity visual designs, which can take hours or even days to change, wireframes can be changed quickly and easily.
How To Use Wireframe Tools?
Now that we’ve answered the question “what is a wireframe?” let’s take a look at how to use wireframe tools to create effective UX designs.
There are three steps in the process: first, you’ll need to choose a wireframing tool; second, you’ll need to create your wireframes; and third, you’ll need to share your wireframes with stakeholders for feedback.
Let’s take a closer look at each step.
Step 1: Choose A Wireframing Tool
There are dozens of different wireframing tools on the market today, so it can be tough to choose one that’s right for your needs. To help narrow down your options, we’ve compiled a list of our favorite wireframing tools below:
- Adobe XD: Adobe XD is a powerful vector-based design tool that’s perfect for creating high-fidelity prototypes. It offers an intuitive interface and a wide range of features to streamline your workflow. Plus, it integrates with other Adobe Creative Cloud applications like Photoshop and Illustrator, making it easy to add extra polish to your designs.
- InVision Studio: InVision Studio is another great option for creating high-fidelity prototypes. Like Adobe XD, it offers an intuitive interface and powerful features to streamline your workflow. But what sets InVision Studio apart is its ease of use—it’s designed specifically for people who aren’t familiar with using design tools like Photoshop or Sketch .
- Balsamiq Mockups: Balsamiq Mockups is an affordable wireframing tool that’s perfect for creating low-fidelity sketches . It offers an easy-to-use drag-and-drop interface and comes with a library of built-in components .
Step 2: Create Your Wireframes
Once you’ve chosen a wireframing tool, it’s time to start creating your wireframes.
The best way to approach this step is by breaking down your project into smaller tasks. For example, if you’re designing an eCommerce website, you might start by sketching out the home page, then move on to the product page, the shopping cart page, etc.
This will help you stay organized and avoid getting overwhelmed by the scope of the project.
Step 3: Share Your Wireframes With Stakeholders
Once you’ve created your wireframes, it’s time to share them with stakeholders for feedback. The best way to do this is by using an online collaboration tool like InVision or Justinmind.
These tools allow you to upload your wireframes and invite others to view them online. They also allow stakeholders to leave comments directly on the design, which makes it easy for you to incorporate their feedback into future iterations.