Are you tired of facing digital walls that stop you from reaching your favorite websites and apps? Do you wish you could access content from anywhere in the world? I am here to help you make it happen!
Learn how to use proxies on your iPhone or iPad to hide your location, change how you appear online, and access more online content.
This guide is your friendly companion, showing you step-by-step how to set up proxies on your iOS device. I am here to keep things super simple – no confusing words, just clear instructions to make your online experience better.
And I’ll ensure you understand how to stay safe online by knowing the possible risks of using proxies.
If you’re ready to explore the internet without any limits, keep reading – I’ve got you covered and you can even configure the proxy on your iPhone side by side reading the article.
Table of Contents
How to Set Up an iOS Proxy Server?
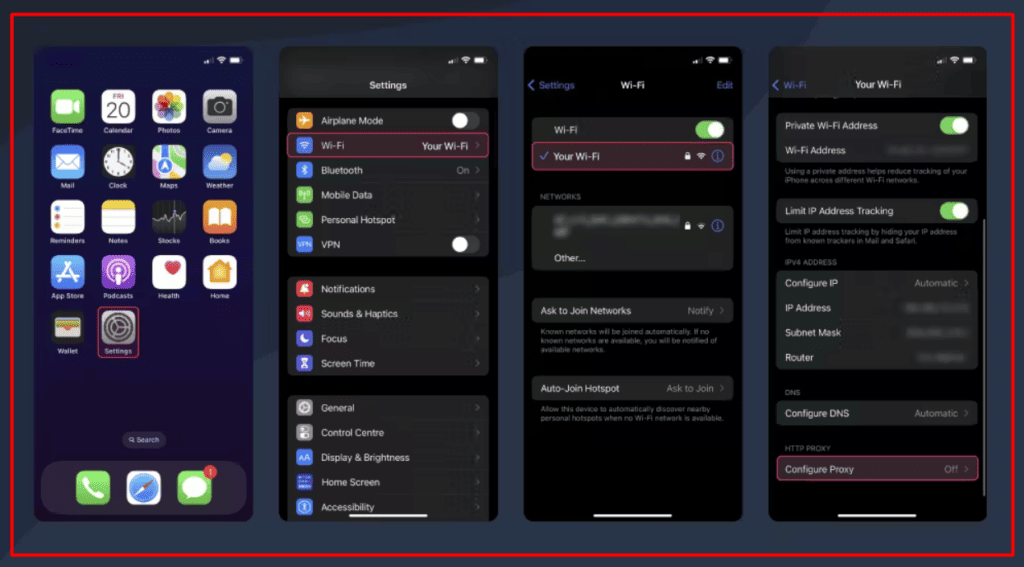
Step 1: Open your iPhone Settings
Unlock your iPhone or iPad and navigate to the home screen.
Look for the “Settings” app icon, which looks like gears. Tap on it to open the Settings.
Step 2: Select Wi-Fi
In the Settings menu, scroll down and find the “Wi-Fi” option. Tap on it.
Step 3: Select the Wi-Fi network you’re connected to
You can find the network with which you are currently connected by looking at the list of available Wi-Fi networks. On the left side, there will be a blue checkmark. Tap on that network’s name.
Step 4: Configure Proxy
After selecting the network, you’ll see more details about it. Scroll down to the bottom of this page and find the “HTTP Proxy” option. Tap on “Configure Proxy.”
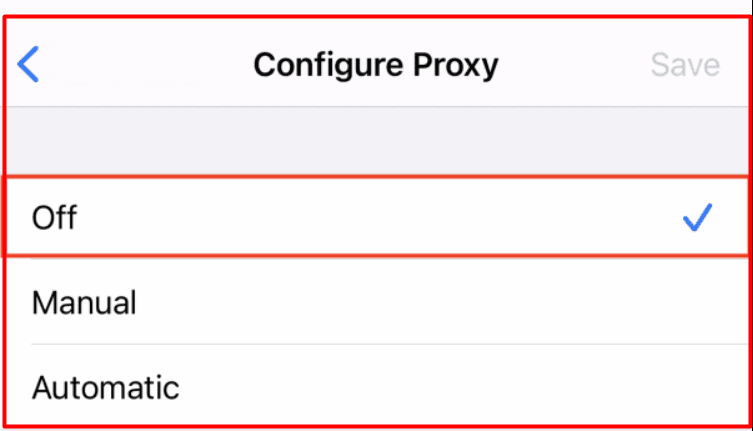
Step 5: Manual or Automatic Configuration
You’ll have two options here: “Manual Configuration” and “Automatic Configuration.” If your proxy provider gave you a specific configuration file, you can choose “Automatic Configuration.” For most users, though, “Manual Configuration” is the way to go.
Step 6: Enter Proxy Server Settings
In the “Server” field, enter the IP address provided by your proxy provider. You might need to enter a hostname instead if you’re using particular types of proxies, such as residential or mobile IPs.
IP address example: 127.168.0.1
en.proxyprovider.net is an example of a hostname
Your proxy provider should provide you with a port number to enter in the “Port” field. A colon separates this number from the IP address or hostname.
en.proxyprovider.net:10000 is an example of a port
If your proxy server requires authentication, such as a username and password, turn on the “Authentication” option. Enter the required credentials in the provided fields.
Precautions:
Be careful while entering proxy settings. Any mistake can result in connection issues.
Ensure you have obtained the correct IP, hostname, port, and authentication details from your proxy provider.
Note:
Remember that you can only set up HTTP(S) proxies through these settings, not SOCKS5 proxies.
Step 7: Test Your Proxy Server
After setting up the proxy, it’s a good idea to test it. You can do this by visiting a website that shows your current IP address and location, like “Show My IP.” Make sure your IP address and location have changed to match the proxy server’s location.
Step 8: Congratulations!
If everything is working fine, congratulations! You have successfully set up a proxy server on your iOS device. Now you can enjoy a different browsing experience with improved privacy and access to restricted content.
Following these steps, you can confidently configure a proxy on your iPhone or iPad. Double-check the details provided by your proxy provider and enjoy your enhanced online experience!
Quick Links:
Conclusion
Congratulations, you’ve learned how to set up and control proxy settings on your iPhone or iPad! This handy process lets you access content freely and protect your privacy.
Remember, proxies can be powerful tools, but be cautious and aware of their usage. If you ever need to switch off the proxy, just follow the simple steps we’ve outlined. Happy browsing!