
You want to get started with Elementor and are searching for a WordPress Elementor tutorial? Your search ends here. In this article, I will brief you about all the things you need to know about Elementor.
Right from installing it to creating a highly stylish page, all your doubts will be solved if you read the article. I assure you; the reading will not go in vain!
But you need a website builder plugin to give a professional touch to your website.
How do you get it? Well, I use Elementor for that. Elementor makes it extremely easy for me to make a professional website by simple drag and drop feature.
Curious to know more about Elementor, then check out my detailed Elementor Review.

Table of Contents
How To Install Elementor On WordPress
Well, there are 2 ways in which you can install Elementor On WordPress.
- Via the official website of Elementor
Head to the official website of Elementor and click on the Free Download button shown on the website.

As soon as you click on the Free Download button, a pop-up will appear to subscribe to the Elementor website, and once you do that same, the Plugin will automatically start downloading.

You will find a zip file downloaded on your laptop/Pc. Now head to your WordPress dashboard and click on the Plugins section > Add New Plugin > Upload Plugin

Choose the Elementor file and upload it to WordPress.

- Via the WordPress dashboard
You can install the Elementor plugin directly from the WordPress dashboard as well. Just go to Plugin and then Add New Plugin
In the top right corner, you will find a search bar, type Elementor in the search bar. The very first result is what you need to install in your WordPress. Simply click install and wait for the Plugin to be installed. Activate the Plugin, and you have a great website builder ready for deployment.

Now that you have Elementor installed in your WordPress dashboard, let us have a look at the features it provides.
Elementor Features And Their Use In Building A Webpage
The list of features that Elementor provides is never-ending, so I will be discussing many vital features of Elementor. Make sure you read them and later try these out.
There are two plans for Elementor The Free and The Pro. As the name suggests for the Pro plan, you will have to play, but there are several features that come with its free plan as well.
I will start by discussing the features in the Free plan first, followed by Pro.
Elementor Free Plan Features
Essential Features:
- Drag and Drop
The drag and drop feature of Elementor is very fast and helps you make design web pages faster. From creating a web page layout to fine-tuning, it all can be done by just dragging and dropping.
You do not need to switch tabs or change the page to design your headers and footers. With Elementor, you could do it on the same page where your primary web page is.
You can copy and paste, even duplicate the styling or the feature you want to use. This saves your time to rebuild the same feature over and over again.
With the search bar option provided by Elementor, you can easily navigate through the website and reach the desired tab in seconds. This feature is really useful when you have a very long page to build.
There are 3 options to save your design, from deleting and getting a backup. You can redo/undo the designs you have done. This gives you the ability to sort of A/B test the page with your observations.
You can visit all the revisions in the revision tab, i.e., You can have a look at all the kinds of designs you have tried so far on your webpage and select an earlier version as well if you do not like your current webpage.
Want to try out many different features and look at what is working? No problem with Elementor; you can design the page in the draft mode, try everything out, and take the page later after you are fully ready to publish the page.
How to use the Elementor Drag and Drop feature
All the drag and drop features are available on the left-hand side of the page as soon as you create a page.
After creating a page on WordPress and giving it a title, just click on edit with Elementor, which will take you to the live editor of Elementor, which looks like the image below.

In the second image above, you can look at the drag and drop options on the left side of the page. There are many widgets you just need to scroll down, or you can also search for a widget with the help of the search bar on top.
- Design Templates
You get inbuilt design templates with Elementor. Not just 5 or 10, but Elementor gives you 100+ design templates that are free to use and more when you upgrade to the Pro version.
How to select the desired template for the Elementor template library
When you first see open the Elementor builder page, you will see something of the sort shown below:
The image is taken from the Elementor website and is pretty self-explanatory.

As soon as you click on the Folder option, you will see a pop-up shown below.

- Widgets
The drag and drop widgets that come with Elementor are countless. Some of them are:
- Inner Section: Let’s divide a section into two.
- Heading: Drop this field into your webpage to plug in a catching heading
- Image: Put images on your webpage with the help of this widget
- Text Editor: Input text in your webpage with the help of a text editor widget
- Video: You can use a Video widget to place quality videos on your page. It will increase the user experience
- Button: Call to actions are very important for almost all the site, with buttons you can put the call to actions on your page and link them to your product landing page.
- Star Rating: Star rating is beneficial for any eCommerce website to give a rating to several different products it has to offer.
- Divider: Helps your web page in the indentation and generates white space to increase user experience.
- Icons: With the icon widget, you can put catchy icons of social media as well as different services to make your page look more attractive.
- Counter: Create a countdown timer for your products or limited additional services to create urgency.
- Testimonials: Add testimonials about your products and services to build trust with your website visitors.
Apart from this, there are many other widgets such as image carousel, basic gallery, tabs, shortcodes, HTML, menu bar, etc. Make sure you look at all the features after installing the plugin on WordPress.
Have a look at some of the widgets that Elementor has below in the image.
How to use Elementor Widgets
For using Elementor Widgets:
Head to the dashboard of Elementor and look on the left side of the page. There are a number of widgets that you can drag and drop on your webpage and start your work.

- Responsive designing and editing
With the mobile-first index rule coming to the limelight, Google makes sure that the mobile-friendly site only ranks higher on Google, and the same is now the case with other SERPs.
With Elementor, you need not worry about mobile-friendliness as all the templates, whether free or paid, are mobile responsive as well as tablet and desktop responsive. You can also edit what features your users will see when they access from mobile or desktop.
You can give them different experiences on both devices, although this practice is not recommended as it might sometimes build confusion in your users’ minds about the brand.
How to see your webpages mobile responsiveness
At the bottom of the webpage builder, in the bottom left corner, you will see three icons that have an option to see your webpage via desktop, tablet, and mobile. The site will look exactly the same for other users after you publish your website.

Workflow features:
- No coding requirement
You do not need to be an expert or even know a little bit about coding when using Elementor. All the widgets mentioned above are drag and drop, and you can easily create a high-end and stylish web page with them.
The Elementor itself takes care of the coding part. Not only this, the code used is optimized and shortened so that it decreases the load time of your webpage- a very important factor for ranking on top.
- Navigator Bar
With the help of navigation, you can see the structure you have designed on the webpage, i.e., the sequencing of your page and the flow. You can change, remove, and duplicate the widgets if you want to via the Navigator bar as well.
How to use Navigation Bar
To use the Navigator, just right-click on the backend of your web page opened with Elementor and click on Navigator. A pop-up will appear, as shown in the image below.

- Hotkeys
Hotkeys are the shortcut keys to the major widget which are present in the Elementor dashboard. Have a look at the image to see some of the pre-set hotkeys.

- Inline editing feature
With Elementor, you do not need to write your content elsewhere and copy-paste and edit the styling of it. You can type directly on the WordPress dashboard with the desired style and save your valuable time.
Design features
- Global Fonts
With the help of Elementor, you can set a particular font style for your whole website with just one click. It doesn’t matter if it’s a heading, a paragraph, a quote, or even a call to action.
- Global Colors
Similarly, as the Global font is set, you can set the color of your whole website text as the same if required.
- Background Gradients
With the gradient color feature, you can light up the background you set for each block and even your homepage. These gradient colors apply to every page you have on your website.
- Background Videos
You can use videos as a background with Elementor. Videos in the Background could really light up your webpage.
How to use design features in Elementor
All the features mentioned above can easily be found in the Elementor dashboard, and you can use these by just clicking and testing what looks good on your webpage.
- Other Features
- Apply Background overlay
- Put slideshow in Background
- Create a canvas to make your page look alive
- Make use of blend modes
- CSS styling filters
- Shape dividers
- Box shadow
- Icons
- Export SVG icons from other websites
Layout features
You can change the webpage layout and optimize it to look good with various features that Elementor provides, like section width and height, column width, gap, and its position.
You can also adjust the margins and padding, which is a very important feature to have on a webpage.
Elementor Pro Plan Features
Essentials
Other than the free feature, Elementor Pro has 2 more features to offer.
1. Pop-up builder
You can create pop-ups for sign up, for a limited time offer, and also exit intent pop-ups to increase your sales and make your page more attractive.
The feature, like other widgets, is present in the dashboard of Elementor.
With Pop-up builder, you can build the following pop-ups:
- Email Subscription
- Login Form pop-ups
- Promotion and sales banner pop-ups
- Lead capture
- Content lock and reveal pop-ups
- Announcements
- Exit Intent
- Welcome Mat type pop-ups
- Related product and upsells
2. Theme Builder
With Elementor Pro, you have full control over all the features you use on your website. You get to design the 404 pages and direct your users to the page of your choice.
You can manage the header and footer on the same page you are designing on. With powerful WooCommerce Integration, you can optimize your product pages as well.
Design features
1. Custom CSS
With every widget you add, you can add a custom CSS snippet to make the content more personalized and attractive. But for using this feature, you should have a decent knowledge of CSS.
Using it without any prior knowledge can go south as well. So if you do not possess the skill set, better stay away from the Custom CSS feature.
2. Motion Effects
You can add great animations and give your website a cartoon type. This helps attract a specific target audience and can be very beneficial at times.
How to use design feature in Elementor
Well, it is not rocket science. Like other widgets, you can scroll the dashboard panel and search for them or just type the widget name in the search panel.
Marketing
These features are the ones that are absent in the Free version of Elementor.
- Form Widget
With the Elementor form builder, you can make various changes and make your forms interesting and attractive to fill.
- Choose the layout you want and spacing quite easily.
- 10+ fields to choose from, which you want in your form.
- Choose from numerous colors and typography that suit and match the webpage design and color scheme.
- You can also create dynamic forms
- If you need a long-form with form builder of Elementor, you can build it and break it into multiple steps so that the users fill it up in an easy way.

- Testimonial Carousel Widget

- You can use the pre-designed templates that come with the Pro version of Elementor and make a stunning testimonial carousel for your business to gain more conversions.
- Align the content and the layout of the carousel. Have full control over the looks and alignment of the carousel.
- The customization templates provided in Elementor Pro are easy to use and give a user-friendly experience to both the one building it and the one seeing it.
How to use Testimonial Carousel Widget in Elementor Pro
- Search for Testimonial Slider in the dashboard search bar. Open the widget, and you can start by creating the slider immediately. There are two skins to choose from the default and the bubble. Choose the one you need according to the styling.
- Align and finalize the layout of your testimonials, which can be done via 5 options Image inline, image stacked, the image above, image left, and image right.
- Choose the style and design according to your color scheme and add content to the slider.
- You can autoplay the slides on the slider, pause it when the users click on it, or set a particular time on the slide change option. I prefer using the pause on the interaction option for my testimonial sliders.
- Action Links
You can connect your website with WhatsApp, google calendar, and many more apps with Elementor Pro.
How to use action links in Elementor Pro
- Go to the Elementor dashboard and search for link fields, which is one of the Pro widgets Elementor has.
- Choose the dynamic option that is available in the top right corner of the widget pop-up.
- Choose the contact URL under the action option.
- Add all the details the widget asks, and you are all set to integrate your contact platform with your website.
Theme Builder Feature
- Dynamic Content
- Make use of impeccable Integration to make a great dynamic webpage.
- You can add dynamic color, images, even website logos, and much more to your webpage.
- The best thing is you can save the layout of the dynamic content you made and use it anywhere throughout the website.
How to use dynamic content with Elementor Pro
I will be showing the example of using a text editor and making the content dynamic. Make sure you see all other widgets and try them out.
- Open a text editor and type the text you want on your webpage. Now click on the icon at the top right corner of the editor, as shown in the image below.
- When you click on the icon, you will see a list of options that appear via a dropdown. These are classified into post, archive, and site. Choose the option you want and start your work immediately.
- Now to further edit the title of your page, you should click on an icon, which is a wrench, as shown in the image below.
In the boxes displayed in the image above, i.e., before, after, and fallback, you need to put the title before the change, a title which should be after the change, and consistent content which will be displayed in the place of dynamic content when there is not before and after the title.
Other theme builder features in Elementor Pro
- Display condition: You can decide what to show and where to show
- Header and Footer: Just with simple drag and drop, you can customize your web page’s header and footer
- Sticky header: Add a sticky header to specific pages or for your whole website globally.
- 404 page: Design a custom 404 page and redirect your users and audience to the page you desire.
Theme Content
- Navigation Menu bar widget
- There are many styling options that you can choose from for your navigation bar.
- These styles are responsive to all the devices, and you can see them on the mobile version and make the necessary changes if required.
- You can animate your navbar with animation and hover effects. It really lights up your page.
- You can choose how to place the menu, i.e., horizontally, vertically, view it as full screen, maybe try the hamburger option.
How to use the navigation menu bar widget
- Head to the dashboard and search for the menu bar
- You can set your menu to horizontal, vertical, or a dropdown according to the style that looks good with your website.
- You can also add single and double lining below each menu content to highlight and even change the color of text via the dashboard.
- Search Widget
The search widget comes with three skins: the default, minimal, and full-screen search widget.
You can tweak the search bar design as well as the button to match your webpage styling.
How to use search bar with Elementor Pro
Head to the Elementor dashboard and look for the search bar widget, choose the style you want, default, full-screen or minimal and change the typography and colors of the search bar to match your color theme.
- Other theme content features you get with Elementor Pro
- Post widget: Modify the look of the sidebar by putting your recent posts there.
- WordPress comment widget: With this widget, the readers can comment about the post you have written.
- Portfolio widget: If you have many portfolios to display, use this portfolio widget to display them in an innovative and attractive style.
All these features are available in the main Elementor dashboard, similar to other widgets. Make sure you have a look at all these features.
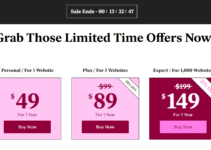
Elementor Pro Pricing

User Review


Quick Links:
FAQs On WordPress Elementor Tutorial
✅Are the Integrations available with the free version of Elementor?
Are the Integrations available with the free version of Elementor?
🤷♀️ What about the customer service of Elementor?
You can opt-in for Elementor customer service with their paid as well as their free plan. Elementor treats all their customers in the same way and the same procedure. You can contact them via email or call them on the toll-free number. It is advisable you mail them first, as their technician will then call you depending on the severity of the problem.
👍What is the preferable Free Elementor or the Pro version?
It would help if you started off with the free version of Elementor, create the basic web pages and make your website whole. After you see that your website is gaining a lot of traffic, you can switch to Elementor Pro as this will open doors to endless opportunities and also help you in product marketing with its powerful integrations.
⁉️How Easy is It to Use Elementor / Is Elementor good for beginners?
Elementor is the simplest page builder to use, yet it also comes with the most functionality for free. Essentially, it's the ideal do-it-yourself option for anybody looking to generate amazing website designs without any coding, HTML, or CSS expertise.
☑️Is Divi better than Elementor?
Both Elementor and Divi provide sophisticated page creation capabilities. Elementor is available for free, and a PRO edition is available for $ 49. Divi is $ 89 a year and allows you to create of an infinite number of websites. While the Divi Builder is intuitive, Elementor is quicker to work with. We recommend Elementor.
👍Which is better Beaver Builder or Elementor?
Beaver Builder lacks certain of the more sophisticated customization features available in Elementor Pro and other solutions like Divi Builder but shines in others. The UI loads fast and features a straightforward, easy-to-understand style. This speeds up the process of creating unique layouts. We recommend Elementor.
📓What is the best add-on for Elementor?
There is a lot, but if you're an Elementor user looking to augment the core page builder's functionality with creative components and widgets, Essential Addons is worth a try. Additionally, Essential Addons includes robust customer assistance in the form of live chat and ticket support to help you resolve any problems.
Also, Read:
Conclusion: WordPress Elementor Tutorial 2024
One of the leading web page designing software, Elementor, is a reliable and vivid platform to build your website on. From creating a basic blog page to creating a stylish and breathtaking product landing page, all can be done with Elementor.
The Pro version of Elementor has endless features to work with and take your website to a new level. It gives you the liberty to have total control of your website as well.
You need not be a coder to use Elementor. Using Elementor is as simple as learning how to click and drag and drop features.
Yes, it takes a bit of time to see all the features and know what features are useful for your website, but the time you devote to Elementor will be worth every bit, I can assure you that.
So, give Elementor a try and let me know your experience by commenting below!
Elementor Popular Videos
Elementor On Social Media
Page Builder Summit 2021 (@summit_camp) is starting tomorrow! Get your FREE ticket and talk to over a 35 industry experts including @bpines1 . Excited to be sponsoring this great event. See you there! 💻🎉https://t.co/gDtFpUJLBH
— Elementor (@elemntor) May 9, 2021
Step aside and welcome our April 2021 Showcase. 🏆🌷 This month we applaud 10 design agencies from all around the globe. This diverse collection accounts for the Elementor web creation talent around the world. 🌎 https://t.co/bwwOUDQCuu
— Elementor (@elemntor) May 19, 2021


Very great post. I simply stumbled upon your weblog and wanted to mention that I’ve really loved
browsing your blog posts. After all I will be subscribing in your feed
and I hope you write once more very soon!